ParaView:Build And Install: Difference between revisions
(Adding build information for the online documentation.) |
|||
| Line 264: | Line 264: | ||
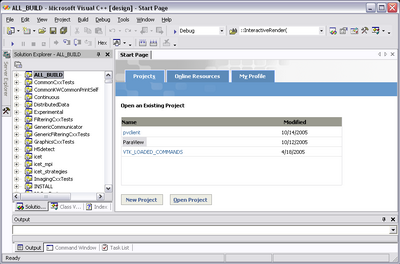
You should now be able to open the '''ParaView''' project (or workspace) file. Make sure to select the appropriate build type (Debug, Release, ...). | You should now be able to open the '''ParaView''' project (or workspace) file. Make sure to select the appropriate build type (Debug, Release, ...). | ||
To build ParaView, simply build the '''ALL_BUILD''' target. | To build ParaView, simply build the '''ALL_BUILD''' target. | ||
The ParaView build does not create the online documentation by default. Select the HTMLDocumentation target, right click, and select Build. | The ParaView build does not create the online documentation by default. Select the '''HTMLDocumentation''' target, right click, and select Build. | ||
[[Image:Brpv visualstudio71.png|400px]] | [[Image:Brpv visualstudio71.png|400px]] | ||
Revision as of 01:53, 17 April 2009
Introduction
This page describes how to build and install ParaView. It covers both the release and the development versions. Also, it covers both Unix-type systems (Linux, HP-UX, Solaris, Mac) as well as Windows.
Prerequisites
The ParaView build process requires CMake version 2.4.5 or higher and a working compiler. On Unix-like operating systems, it also requires Make, while on Windows it requires Visual Studio (7 or later).
Building ParaView's user interface requires Trolltech's Qt, version 4.3.* (4.3.5 recommended) Qt is dual licensed. To compile ParaView, either the open or commercial version may be used. If you intend to make changes the ParaView's GUI and distribute the results, you must obtain a commercial license. The open source version of Qt can be found here [1]. Commercial licenses can be purchased directly from TrollTech [2]. For more information on what can be done with the open source version, read this [3].
In order to run ParaView in parallel, MPI [4], [5] is also required.
In order to use scripting, python is required [6].
Download And Install Cmake
CMake is a tool that makes cross-platform building simple. On several systems it will probably be already installed. If it is not, please use the following instructions to install it. If CMake does not exist on the system, and there are no pre-compiled binaries, use the instructions below on how to build it.
Use Binaries
There are several precompiled binaries available at the CMake download page.
On Unix-like operating systemsLet's say on Linux, download the appropriate version and follow these instructions: cd $HOME wget http://www.cmake.org/files/v2.4/cmake-2.4.5-Linux-i386.tar.gz mkdir software cd software tar xvfz ../cmake-2.4.5-Linux-i386.tar.gz
|
On Windows
On Windows, if you are not administrator
|
Build Your Own CMake
On Unix-like operating systemsDownload the source code http://www.cmake.org/files/v2.4/cmake-2.4.5.tar.gz cd $HOME wget http://www.cmake.org/files/v2.4/cmake-2.4.5.tar.gz tar xvfz cmake-2.4.5.tar.gz mkdir cmake-2.4.5-bin cd cmake-2.4.5-bin ../cmake-2.4.5/bootstrap --prefix=$HOME/software make make install
|
On WindowsTo build CMake on windows, a previous version of CMake is required. This can be downloaded from the CMake download page. |
Build ParaView
Download ParaView Source Code
If you are trying to build a ParaView release, download it from the release page. For the development version, please follow the instructions below for checking it out from CVS.
Download The Release
You can always download the binaries from ParaView download page. This page contains binaries for several platforms and the source code for the releases.
Checkout Development Version from CVS
On Unix-like operating systemsmkdir $HOME/projects cd $HOME/projects cvs -d:pserver:anoncvs@www.paraview.org:/cvsroot/ParaView3 login <enter> cvs -d:pserver:anoncvs@www.paraview.org:/cvsroot/ParaView3 co ParaView3 |
On WindowsIf you have Cygwin or Mingw shell, then use them, and follow the instructions for Unix-like oprating systems.
If you are on Windows and do not have Cygwin or Mingw shell, please download a CVS client. We recommend TortoiseCVS, which is a GUI for CVS on Windows.
The following parameters are used for TortoiseCVS:
|
Configure ParaView With CMake
- Always use a separate build directory. Do not build in the source directory.
On Unix-like systems
mkdir $HOME/projects/ParaView-bin
cd $HOME/projects/ParaView-bin

ccmake $HOME/projects/ParaView3
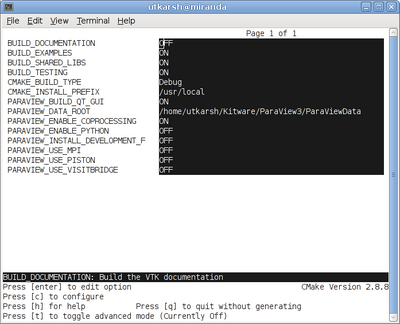
About CCMake (Curses CMake GUI)
|
On Windows
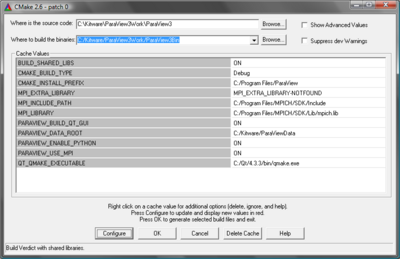
About CMakeSetup (Windows CMake GUI)
|
ParaView Settings
| Variable | Description |
| BUILD_SHARED_LIBS | If ON, use shared libraries. This way executables are smaller, but you have to make sure the shared libraries are on every system on the cluster. |
| PARAVIEW_USE_MPI | Turn this to ON to enable MPI. Other MPI options will not be available until you turn this on. |
| MPI_LIBRARY | Path to the MPI library (such as /usr/lib/libmpi.so). Should be found by default, but you may have to set it. (see the note below) |
| MPI_EXTRA_LIBRARY | Path to extra MPI library (such as /usr/lib/libmpi++.so). If the MPI distribution is MPICH, this may not be found; in this case, it is ok for this variable to be set to MPI_EXTRA_LIBRARY-NOTFOUND. |
| MPI_INCLUDE_PATH | Path to MPI includes (such as /usr/include/mpi). Again, this should be found by default. |
| PARAVIEW_ENABLE_PYTHON | Makes python client scripting and the python programmable filter available. |
| PARAVIEW_BUILD_QT_GUI | Flag to enable/disable the building of the ParaView Qt-based client. This option is useful when building paraview on server nodes or when we are only interested in the python client, as it avoids building of the Qt client thus does not require Qt. ON by Default. |
| QT_QMAKE_EXECUTABLE | Path to Qt's qmake executable (such as /usr/local/Trolltech/Qt-4.2.2/bin/qmake). Cmake uses this to locate the rest of the required Qt executables, headers and libraries. |
| VTK_USE_CARBON | For Mac, this is the default. Neither X11 nor COCOA frameworks are supported. |
Note for MPI settings: If your MPI variables aren't set automatically (usually the case if the compiler wrapper [mpicxx] is not in the path or in some standard directory), toggle advanced options and set MPI_COMPILER variable to the full path of your mpi compiler (usually mpicxx), and configure. This should set all the required MPI variables. If not, then you might need to enter them manually.
Finish Configuring ParaView
Using CCMake
|
Using CMakeSetup
|
Build ParaView
You can now build ParaView using the appropriate build system.
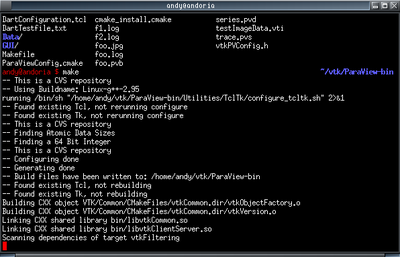
Using MakeCMake will now generate Make files. These makefiles have all dependencies and all rules to build ParaView on this system. You should not however try to move the build directory to another location on this system or to another system. Once you have makefiles you should be able to just type: make
make -j 4
make HTMLDocumentation |
Using Visual StudioCMake will now create Visual Studio project files. Before you open Visual Studio, be sure that the Qt .dlls are in your path. You should now be able to open the ParaView project (or workspace) file. Make sure to select the appropriate build type (Debug, Release, ...). To build ParaView, simply build the ALL_BUILD target. The ParaView build does not create the online documentation by default. Select the HTMLDocumentation target, right click, and select Build. |
Install ParaView
ParaView can be run directly from the build directory. That said, for production environments, it should be installed in some system location.
Using MakeOn Unix-like operating systems, the install location is /usr, /usr/local, /opt, or something similar. You can change the install location by changing the CMAKE_INSTALL_PREFIX cmake variable. To install ParaView, simply run: make install Make sure to have write access to this location. If you do not, it may be necessary to run install as an administrator. For example, on Unix you would do something like: su <root password> make install |
Using Visual StudioOn Windows, this location is something like c:\Program Files\ParaView. To install ParaView, simply run INSTALL target within the build system. |
Distributing ParaView
It is possible to create distribution binaries for ParaView using CPack which is included in CMake. The packaged binary can be in any of the variable supported generator formats eg. DEB (debian packages), RPM (RPM Packages), NSIS (Null Soft Installer) etc. Please refer to [[7]] for a complete list.
|
On Unix-like operating systems To generate a tar ball, in the binary directory, simply run cpack -G TGZ To generate a RPM, in the binary directory, simply run cpack -G RPM |
On Windows, to generate a null-soft installer (requires [8]), in the binary directory, simply run cpack -G NSIS |
Notes
Compiling on the Mac
To compile on the Mac, follow the instructions for Unix. The recommended configuration settings are: VTK_USE_CARBON=ON, BUILD_SHARED_LIBS=ON, VTK_USE_RPATH=ON
Environment Variables
If you build with shared libraries, you may have to add the Qt directory to you PATH environment variables to run paraview. On windows one way to do so is to open up the environment variables dialog by clicking through Start->Control Panel->System->Advanced->Environment Variables. From that dialog add a new user variable called PATH with a value of C:\Qt\4.2.2\bin. For other operating systems, add Qt/4.2.2/lib to your LD_LIBRARY_PATH environment variable.


