Advanced Lookmarks
Introduction
Lookmarks provide a way to save and manage views of what you consider to be the important regions of your dataset in a fashion analogous to how bookmarks are used by a web browser, all within ParaView. They automate the mundane task of recreating complex filter trees, making it possible to easily toggle back and forth between views. They enable more effective data comparison because they can be applied to different datasets with similar geometry. They can be saved to a single file and then imported in a later ParaView session or shared with co-workers for collaboration purposes. A lookmark is a time-saving tool that automates the recreation of a complex view of data.
Creating a Lookmark
- Open data set disk_out_ref.exo. This dataset can be downloaded at http://www.paraview.org.
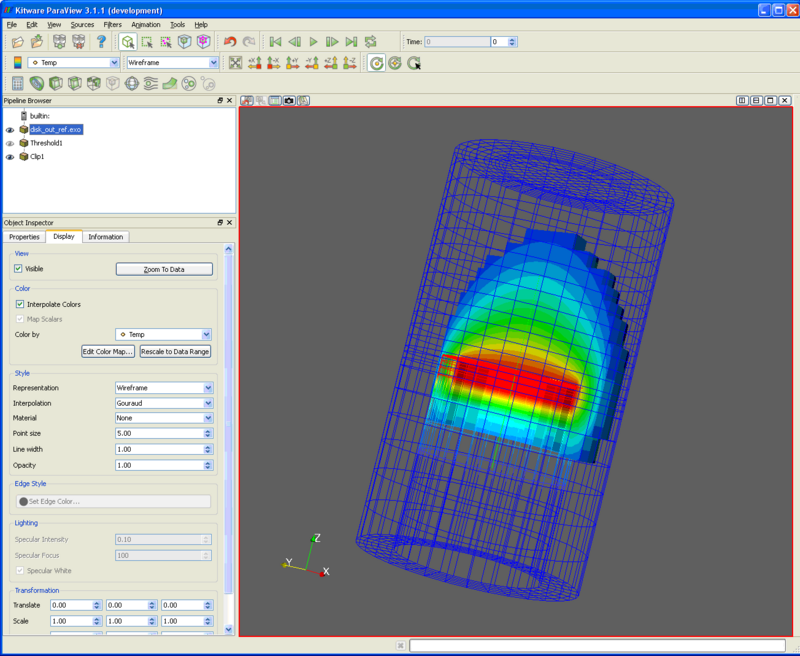
- On the Properties tab, select all variables and press the Apply button. On the Display tab, select Color by Temp.
- From the Filters menu, add a Threshold filter. Select Scalars of Temp. For the lower threshold select 330 and set the upper threshold to the maximum. (This can be reset by moving the slider bar, then returning it to the maximum position. Press Apply.
- Add a Clip filter. Press the X Normal button. Uncheck the Show Plane check box. Press Apply.
- In the Pipeline Browser in the upper left corner of the display, select the data file disk_out_ref.exo. On the Display tab select Wireframe for Representation. Turn on the “eyeball” that is to the left of the data set name “disk_out_ref.exo”.
- At this point you should have something that looks similar to the image below.
- Now press the lookmark icon to create a lookmark. It is located at the top left of the current view.
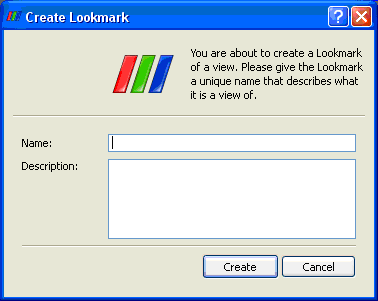
- This will pop up the Create Lookmark window.
- Name your lookmark. Press Create.
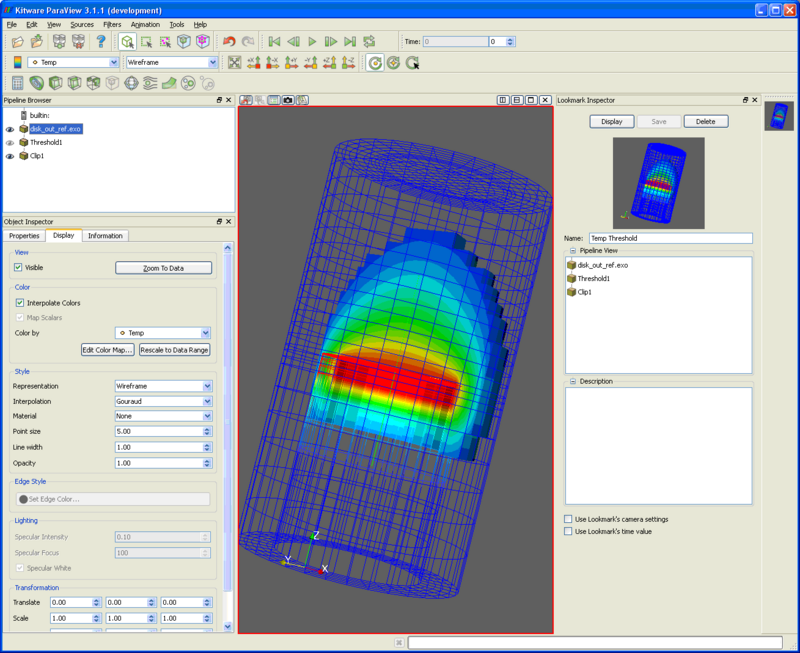
- To the right of the display you should have a thumbnail image of the lookmark that you just created. Right click on the image and select Edit. This will open the Lookmark Inspector.
- The Lookmark Inspector gives you an overview of the selected lookmark. You may change the name and description of the lookmark and view the pipeline used to create the lookmark. By checking the Use Lookmark’s camera settings and/or Use Lookmark’s time value check boxes you can save the angle and time step used at the time of the lookmark’s creation.
- Since this particular data set does not have time steps, we will only check the Use Lookmark’s camera settings box. Press the Save button.
- From the View menu, select Lookmark Browser. This will open another display window. Select the newly created lookmark. Press the Export button. This will save our lookmark to an XML file that can later be imported to another ParaView session.
- Note: You do not have to use the same data set when importing a lookmark. As long as the new data set is “similar” enough to the original dataset that was used to create the lookmark, you may apply it to the new dataset.
- Exit and restart paraview. Open your dataset. This may be the same dataset or one that is similar to the one where we created the lookmark.
- Open the Lookmark Browser. Select Import. Open the lookmark that you previously exported. Close the Lookmark Browser. Now click on the thumbnail image that is on the far right of the display.
- Notice that the pipeline has been reconstructed to produce the image that was saved by the lookmark.
- Note: If you press the lookmark thumbnail again, the pipeline will once again be reconstructed on top of the existing pipeline. This may or may not be your desired intent. You can very easily overcrowd the Pipeline Browser with a redundant pipeline.
Acknowledgements
Sandia is a multiprogram laboratory operated by Sandia Corporation, a Lockheed Martin Company, for the United States Department of Energy’s National Nuclear Security Administration under contract DE-AC04-94AL85000.


