SimpleITK/GettingStarted/A visual guide to SimpleITK with CSharp
In this guide we will show how to setup a C# project in Microsoft Visual Studio 2012 which used the available build binaries for SimpleITK. The same steps and options are needed for the other versions of Visual Studio.
Download
Binary downloads are readily available for C# for Microsoft Visual Studio. They are available on SourceForge.
Select the correct download for you architecture you are going to target.
C# for SimpleITK has two components: Native and Managed. The native code contains the SimpleITK C++ library and is compiled for the particular architecture. There is the "win32" for the Intel x86 32-bit architecture, and the "win64" for the Intel x64 architecture. The correct architecture needs to be chosen.
Unzip downloaded zip file into you "Documents" folder. Inside you will find two "dll" files: "SimpleITKCSharpManaged.dll" and "SimpleITKCSharpNative.dll", as well as some documentation files.
Adding C# SimpleITK to a Project
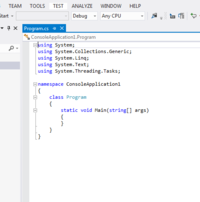
We will start off with a new C# console solution. This is created by selecting "File->New->Project", then selecting under Templates "Visual C#" and then choosing the "Console Application".
Select Architecture
The SimpleITK binary only support a single platform architecture. You project should be configured to match that platform.
By default, in the Toolbar "Debug" is selected for the Solution Configuration and "Any CPU" is selected for the Solution Platform.
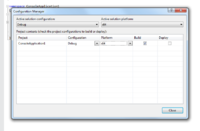
Bring up the "Configuration Manager" dialog from the menu "BUILD->Configuration Manger...".
The architecture of the binary needs to be added, and the "Any CPU" architecture needs to be removed. This needs to be done for both the "Active solution platforms" and the "Platform".
Add Managed Library
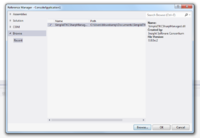
From the menu bar select "PROJECT->Add Reference..." to bring up the Reference Manager. Click "Browse..." and navigate the file system to unzip "SimpleITKCSharpManaged.dll" from the binary download, then click OK to add.
Add Native Library
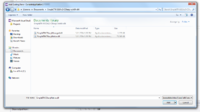
From the menu bar select "PROJECT->Add Existing Item...". Select "Executable Files" for the extension type. Then navigate the file system to the unzipped "SimpleITKCSharpNative.dll" file from the binary download. *IMPORTANT* in the "Add" button's pull down menu select "Add As Link".
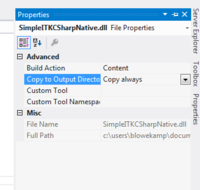
In the Solution Explorer right click on the "SimpleITKCSharpNative.dll", and select "Properties". Then for "Build Action", choose "Content", and "Copy to OutputDirectory" choose "Copy always".
Building an Example
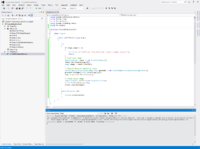
Now that we have configured the project, let up copy a basic SimpleITK example to compile and run. The SimpleGaussian in C# is a simple one to test our configuration. This can just be copied an pasted into the code editor.
Then from the file menu "BUILD->Build Solution" can be selected.
If all the steps were followed correctly you should now have an executable which can be run from the command line or from within Visual Studio with the appropriate arguments provided.


