Bender/Documentation/2.0/Modules/FEMWorkflow: Difference between revisions
| (10 intermediate revisions by 2 users not shown) | |||
| Line 14: | Line 14: | ||
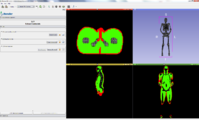
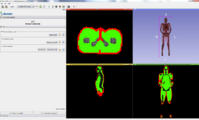
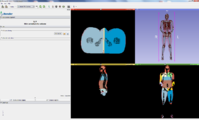
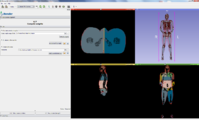
= Use Cases = | = Use Cases = | ||
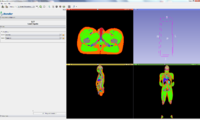
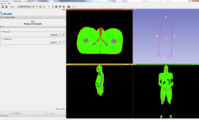
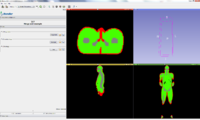
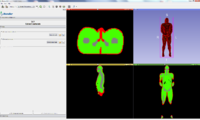
<gallery widths=220px perrow=5> | <gallery widths=220px perrow=5> | ||
Image:BenderFEMWorkflow-v2.0-1-LoadInputs.png|[[# |1) Load Inputs]] | Image:BenderFEMWorkflow-v2.0-1-LoadInputs.png|[[#1.29_Adjust_labelmap |1) Load Inputs]] | ||
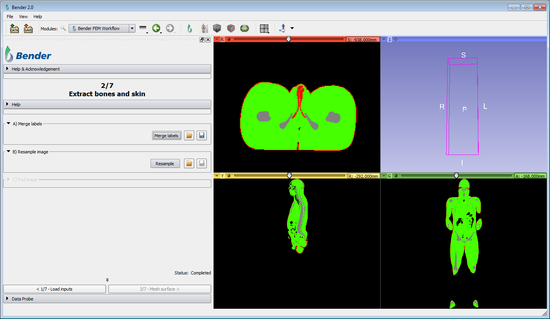
Image:BenderFEMWorkflow-v2.0-2A-MergeLabels.png|[[# |2-A) Merge labels]] | Image:BenderFEMWorkflow-v2.0-2A-MergeLabels.png|[[#A.29_Merge_labels |2-A) Merge labels]] | ||
Image:BenderFEMWorkflow-v2.0-2B-ResampleAndPad.png|[[# |2-B) and 2-C) Voting Resample and Pad Image]] | Image:BenderFEMWorkflow-v2.0-2B-ResampleAndPad.png|[[#B.29_Resample_image |2-B) and 2-C) Voting Resample and Pad Image]] | ||
Image:BenderFEMWorkflow-v2.0-3A-CreateTetMesh.png|[[# |3-A) Create tetrahedral mesh]] | Image:BenderFEMWorkflow-v2.0-3A-CreateTetMesh.png|[[#A.29_Create_tetrahedral_mesh |3-A) Create tetrahedral mesh]] | ||
Image:BenderFEMWorkflow-v2.0-3B-ExtractBoneMesh.png|[[# |3-B) Extract bone mesh]] | Image:BenderFEMWorkflow-v2.0-3B-ExtractBoneMesh.png|[[#B.29_Extract_bone_mesh |3-B) Extract bone mesh]] | ||
Image:BenderFEMWorkflow-v2.0-3C-ExtractSkinMesh.png|[[# |3-C) Extract skin mesh]] | Image:BenderFEMWorkflow-v2.0-3C-ExtractSkinMesh.png|[[#C.29_Extract_skin_mesh |3-C) Extract skin mesh]] | ||
Image:BenderFEMWorkflow-v2.0-4-Armatures.png|[[# |4) Armature/Rig]] | Image:BenderFEMWorkflow-v2.0-4-Armatures.png|[[#4.29_Create_armature_.28rigging.29 |4) Armature/Rig]] | ||
Image:BenderFEMWorkflow-v2.0-5-VolumeSkinning.png|[[# |5) Volume skinning]] | Image:BenderFEMWorkflow-v2.0-5-VolumeSkinning.png|[[#5.29_Volume_skinning |5) Volume skinning]] | ||
Image:BenderFEMWorkflow-v2.0-6-ComputeWeights.png|[[# |6) Bone weights]] | Image:BenderFEMWorkflow-v2.0-6-ComputeWeights.png|[[#6.29_Compute_weights |6) Bone weights]] | ||
Image:BenderFEMWorkflow-v2.0-7-SimulatePose.png|[[# |7) Pose surface]] | Image:BenderFEMWorkflow-v2.0-7-SimulatePose.png|[[#7.29_Pose_armature_.28posing.29 |7) Pose surface]] | ||
</gallery> | </gallery> | ||
| Line 39: | Line 39: | ||
= Tutorials = | = Tutorials = | ||
{| | {| | ||
|[[Image:Bender-2.0-tutorial-video.png|link=http://vimeo.com/73247670|400px|thumb|[[Bender/Documentation/2.0/Tutorial|Arm tutorial]]]] | |||
|} | |} | ||
| Line 159: | Line 160: | ||
|} | |} | ||
== 3) | == 3) Extract materials == | ||
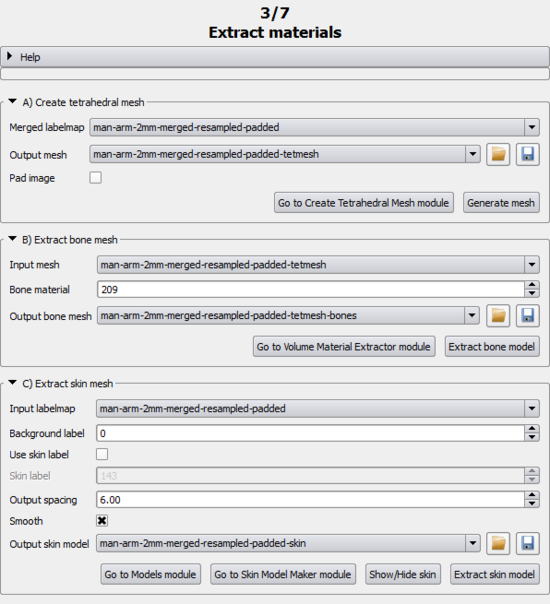
The [[#3. | The [[#3.29_Extract_materials|3) Extract materials]] page generates a multi-material tetrahedral mesh from the image and extracts bone and skin surface models to interactively control the posing. | ||
{| width="100%" | {| width="100%" | ||
| Line 172: | Line 173: | ||
* '''Output Mesh''': Select the output that will contain the tetrahedral mesh. | * '''Output Mesh''': Select the output that will contain the tetrahedral mesh. | ||
'''Advanced options''' | '''Advanced options''' | ||
* '''Merged | * '''Merged labelmap''': Select the input labelmap that contains a limited number of materials (up to 3). By default, it is ''Output labelmap'' in [[#C.29_Pad_image|2.C) Pad image]]. | ||
* '''Pad image''': If non zero labels are at the border of the image, pad the image for correct results. This option is not required if the image has previously been padded in [[#C.29_Pad_image|2.C) Pad image]]. | * '''Pad image''': If non zero labels are at the border of the image, pad the image for correct results. This option is not required if the image has previously been padded in [[#C.29_Pad_image|2.C) Pad image]]. | ||
* '''Go To Create Tetrahedral Mesh module''': Open the [[../CreateTetrahedralMesh|Create Tetrahedral Mesh]] module to generate the tetrahedral mesh. | * '''Go To Create Tetrahedral Mesh module''': Open the [[../CreateTetrahedralMesh|Create Tetrahedral Mesh]] module to generate the tetrahedral mesh. | ||
| Line 199: | Line 200: | ||
* '''Input labelmap''': Select the labelmap volume to extract the skin model from. | * '''Input labelmap''': Select the labelmap volume to extract the skin model from. | ||
* '''Background label''': Select the threshold used to differentiate the body in the labelmap (foreground) from the outside air (background). Default is 0. | * '''Background label''': Select the threshold used to differentiate the body in the labelmap (foreground) from the outside air (background). Default is 0. | ||
* '''Use skin label''': Peel the skin | * '''Use skin label''': Peel the skin from the input labelmap, this generates an eroded skin model. | ||
* '''Skin label''': Value of the skin label | |||
* '''Output spacing''': Controls the spacing of the points in the generated decimated mesh. | |||
* '''Smooth''': Apply smoothing filter on the generated surface mesh. A smooth surface improves the collision detection at the [[#7.29_Simulate_Pose|7) Simulate Pose]] step. | |||
* '''Go To Models''': Open the [http://wiki.slicer.org/slicerWiki/index.php/Documentation/4.1/Modules/Models Models] module to change the created model properties such as name, opacity, color... | * '''Go To Models''': Open the [http://wiki.slicer.org/slicerWiki/index.php/Documentation/4.1/Modules/Models Models] module to change the created model properties such as name, opacity, color... | ||
* '''Go To Skin Model Maker''': Open the [[../SkinModelMaker|Skin Model Maker]] module to access more controls over the model extraction parameters such as smoothing. | * '''Go To Skin Model Maker''': Open the [[../SkinModelMaker|Skin Model Maker]] module to access more controls over the model extraction parameters such as smoothing. | ||
| Line 233: | Line 237: | ||
|} | |} | ||
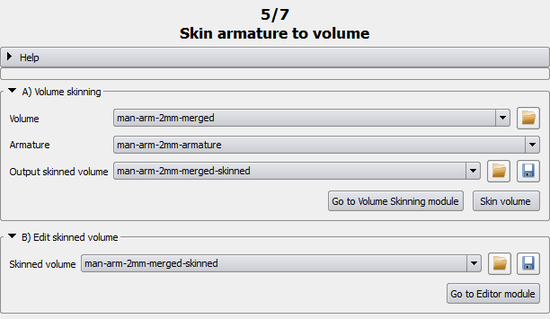
== | == 5) Volume skinning == | ||
Before computing the weights, the skinning volume must first be extracted. The skinning volume represents what bone influence the most a given voxel. For each voxel a unique bone index is assigned. | Before computing the weights, the skinning volume must first be extracted. The skinning volume represents what bone influence the most a given voxel. For each voxel a unique bone index is assigned. | ||
This means that if we were to use binary weights (see [[../ComputeArmatureWeight|Compute Armature Weight]]) , a given voxel would rotate similarly to its associated bone in the skinned volume. Because the skinning might not produces perfect results (some voxels might be assigned the wrong bones), and because the skinned volume drives the weight computation, it can be useful to tweak the output skinned volume, most notably in joints area. The [http://wiki.slicer.org/slicerWiki/index.php/Documentation/4. | This means that if we were to use binary weights (see [[../ComputeArmatureWeight|Compute Armature Weight]]), a given voxel would rotate similarly to its associated bone in the skinned volume. Because the skinning might not produces perfect results (some voxels might be assigned the wrong bones), and because the skinned volume drives the weight computation, it can be useful to tweak the output skinned volume, most notably in joints area. The [http://wiki.slicer.org/slicerWiki/index.php/Documentation/4.3/Modules/Editor Editor] module can be used to edit the labelmap. | ||
'''Note:''' When opening this page, the view switches to ''Four Up''. | '''Note:''' When opening this page, the view switches to ''Four Up''. | ||
| Line 257: | Line 261: | ||
'''Simple workflow''' | '''Simple workflow''' | ||
* '''Go To Editor Module''': Open the [http://wiki.slicer.org/slicerWiki/index.php/Documentation/4. | * '''Go To Editor Module''': Open the [http://wiki.slicer.org/slicerWiki/index.php/Documentation/4.3/Modules/Editor Editor] module with the skinned volume obtained by the [[#A) Volume skinning| volume skinning]]. | ||
'''Advanced workflow''' | '''Advanced workflow''' | ||
* '''Skinned volume''': Select the volume that will be modified in the editor. More information in the [http://wiki.slicer.org/slicerWiki/index.php/Documentation/4. | * '''Skinned volume''': Select the volume that will be modified in the editor. More information in the [http://wiki.slicer.org/slicerWiki/index.php/Documentation/4.3/Modules/Editor Editor] module documentation. | ||
| valign="top"| | | valign="top"| | ||
[[Image: | [[Image:BenderFEMWorkflow-5-VolumeSkinning-2.0.png|thumb|550px|Skin volume panel]] | ||
[[Image:BenderWorkflow-v1.1-4-VolumeSkinning.png|thumb|550px|4)Volume skinning]] | [[Image:BenderWorkflow-v1.1-4-VolumeSkinning.png|thumb|550px|4)Volume skinning]] | ||
|} | |} | ||
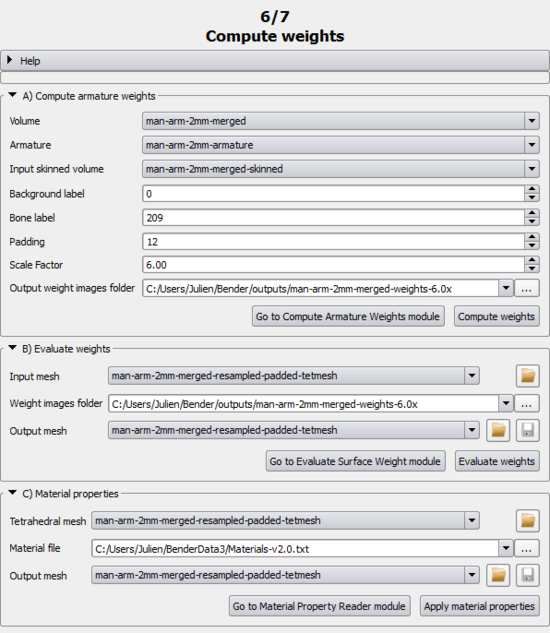
== | == 6) Compute weights == | ||
The [[# | The [[#6.29_Compute_weights|Compute weights]] section assigns a weight for each voxel of the input volume. The weights represent how much a voxel is influenced by a bone. It is later used when posing the volume and computing the unique transform to apply at a voxel (by interpolating the influencing bones transforms). | ||
{| width="100%" | {| width="100%" | ||
| Line 291: | Line 295: | ||
* '''Go To Compute Armature Weights module''': Open the [[../ComputeArmatureWeight|Compute Armature Weight]] module to further refine the computation of the weights by, for example, restricting it to a given bone or changing the downsampling ratio. | * '''Go To Compute Armature Weights module''': Open the [[../ComputeArmatureWeight|Compute Armature Weight]] module to further refine the computation of the weights by, for example, restricting it to a given bone or changing the downsampling ratio. | ||
=== B) Evaluate | === B) Evaluate weights === | ||
Evaluate weights at each vertices of the tetrahedral mesh. | |||
'''Simple workflow''' | '''Simple workflow''' | ||
* '''Output | * '''Output mesh''': Select the output surface that will contain the evaluated weights at each point of '''Input surface'''. | ||
* '''Evaluate | * '''Evaluate weights''': For each point of the '''Input Surface''', evaluate the influence (weight) of each bone and add the weights into field arrays (one point data array per bone). This improves the computational time of the '''Pose Surface'''. | ||
'''Advanced workflow''' | '''Advanced workflow''' | ||
* '''Input | * '''Input mesh''': Select the input surface that will have the weight evaluated on. | ||
* '''Weight images folder''': Select the folder containing the weight image files. | * '''Weight images folder''': Select the folder containing the weight image files. | ||
* '''Go To Evaluate Surface Weight module''': Open the [[../EvalWeight|Evaluate | * '''Go To Evaluate Surface Weight module''': Open the [[../EvalWeight|Evaluate weights]] module to access further parameters. | ||
=== C) Material properties === | |||
Apply material properties at each vertices of the tetrahedral mesh. | |||
'''Simple workflow''' | |||
* '''Output mesh''': Select the tetrahedral mesh that will contain the materials at each point of '''Tetrahedral mesh'''. | |||
* '''Material file''': Select the file that contains the material properties such as Young modulus and Poisson ratio for each label value. | |||
'''Advanced workflow''' | |||
* '''Tetrahedral mesh''': Select the input mesh to apply material properties onto. | |||
* '''Go To Material Property Reader''': Open the [[../MaterialPropertiesReader|Material property reader]] module to access further parameters. | |||
| valign="top"| | | valign="top"| | ||
[[Image: | [[Image:BenderFEMWorkflow-6-ComputeWeights-2.0.png|thumb|550px|Compute weights panel]] | ||
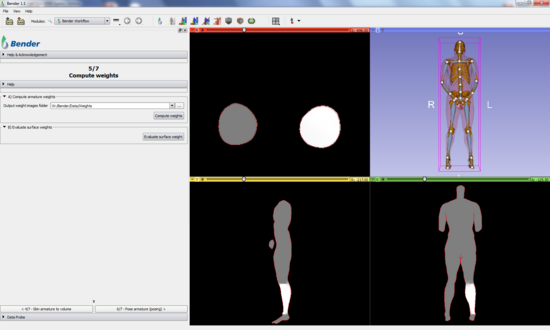
[[Image:BenderWorkflow-v1.1-5-ComputeWeights.png|thumb|550px|5-B)Compute armature weights]] | [[Image:BenderWorkflow-v1.1-5-ComputeWeights.png|thumb|550px|5-B)Compute armature weights]] | ||
|} | |} | ||
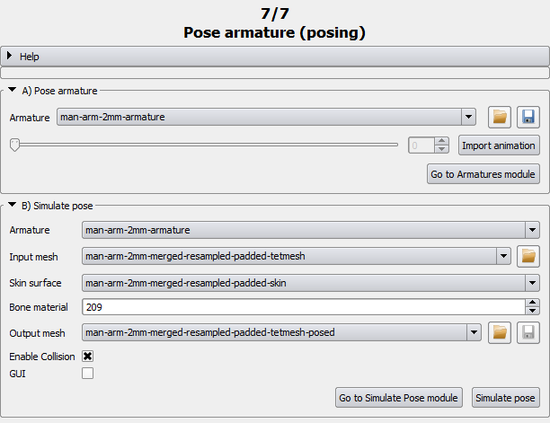
== | == 7) Pose armature (posing)== | ||
The [[#5.29_Pose_armature_.28posing.29|Pose armature]] section guides the user into posing the armature for the final [[#6.29_Pose_labelmap|Pose labelmap]] resampling. | The [[#5.29_Pose_armature_.28posing.29|Pose armature]] section guides the user into posing the armature for the final [[#6.29_Pose_labelmap|Pose labelmap]] resampling. | ||
| Line 324: | Line 338: | ||
'''Simple workflow''' | '''Simple workflow''' | ||
* '''Armature''': The armature(rig) to pose. Once selected, click and drag any bone to rotate around its joint. | |||
* '''Import Animation''': Import a pose from a BVH file. Please note that the number of bones in the BVH must be the same than the armature. | |||
'''Advanced workflow''' | |||
* '''Go Armature module''': Open the [[../Armatures|Armatures]] module to further control the armature and its posing (e.g. reset the current pose to its originals rest value). | * '''Go Armature module''': Open the [[../Armatures|Armatures]] module to further control the armature and its posing (e.g. reset the current pose to its originals rest value). | ||
===B) Pose | ===B) Simulate Pose === | ||
Transform the tetrahedral mesh according to the armature pose and the material properties. | |||
'''Simple workflow''' | '''Simple workflow''' | ||
* '''Output | * '''Output mesh''': Select the output mesh that will store the posed '''Input mesh'''. | ||
* ''' | * '''Enable collision''': Run the simulation with or without collision detection. If enabled, the mesh will not self-intersect, however it slows down the computation. | ||
* '''Simulate pose''': Pose the '''Input mesh''' according to the posed '''Armature'''. | |||
'''Advanced workflow''' | '''Advanced workflow''' | ||
* '''Armature''': Select the posed input armature. | * '''Armature''': Select the posed input armature. | ||
* ''' | * '''Input mesh''': Select the input mesh to transform with the armature pose. | ||
* '''Go To Pose | * '''Skin surface''': Select the skin surface used for collision. | ||
* '''Bone material''': Set the value of the bone label used internally to threshold the tetrahedral mesh to apply forces only on the bones. | |||
* '''GUI''': Show the Sofa GUI to control the simulation. | |||
* '''Go To Simulate Pose module''': Open the [[../SimulatePose|Simulate Pose]] module to choose more parameters. | |||
| valign="top"| | | valign="top"| | ||
[[Image: | [[Image:BenderFEMWorkflow-7-PoseArmature-2.0.png|thumb|550px|Pose armature panel]] | ||
[[Image:BenderFEMWorkflow-v2.0-7-SimulatePose.png|thumb|550px|7)Pose armature]] | |||
|} | |} | ||
Latest revision as of 13:41, 1 April 2014
Introduction
The Workflow module guides the user step-by-step into transforming a volume using a rigging, skinning and posing technique using a multimaterial tetrahedral mesh and Finite Element Method (FEM).
Typically, the anatomical pose of a voxelized model is limited by the imaging device used to acquire the underlying data, e.g., MRI and CT scanners have narrow entries. Changing the pose of an already acquired voxelized anatomical model enables new processing of human anatomy in a wide variety of poses. The workflow module allows an operator to specify a rigging that represents the anatomical pose of an existing voxel model, manipulate that rigging into a different anatomical pose, and then generate a new voxelized model that represents the original model resampled into that new position.
This module applies to voxelized models the Skeletal animation technique initially conceived for surfaces.
Details
Author: Julien Finet, Kitware
Contributor #1: Johan Andruejol, Kitware
Acknowledgements: This work is supported by the Air Force Research Laboratories.
Contact: Julien Finet
Use Cases
Tutorials
Parameters
Advanced properties
The Advanced properties can be shown or hidden by clicking on the
expanding button.
Settings
|
Data
|
Volume Rendering
|
The Volume Rendering section can volume render intermediate or final volume/labelmap.
|
1) Adjust labelmap
The Adjust labelmap is the first step of the workflow. The user selects here the volume to pose and can optionally prepare the volume before any further computation is applied.
A) LabelmapThis section makes sure the input labelmap has the right color table associated with it and is in the right coordinate system. Simple options
Advanced options
|
2) Merge and resample
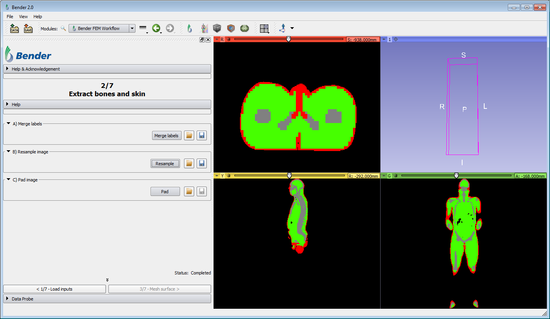
The 2) Extract bone and skin page creates the bone and skin surface models to interactively control the posing.
A) Merge labelsSome labelmaps can have multiple labels for representing bones (e.g. bone marrow, bone cancellous, skull...). This section provides the functionality of merging the bones labels and the skin labels of the input labelmap to simplify the visualization and usability of the bones and the skin. It is important to merge those similar labels into a unique label (1 for the bones, 1 for the skin) as the Bender workflow handles only 1 label for the bones and 1 label for the skin. . Simple options
Advanced options
One the right side of each of those labels is listed all the labels that will be changed into one of them. These labels are automatically selected from the input volume color table (set in A) Labelmap) by looking for color names containing the strings corresponding strings.
B) Resample imageThis section resamples the input merged labelmap using the Voting Resample module. This allow the mesh computation in Create Tetrahedral Mesh to be faster and lighter. The Voting Resample module is used here to make that the Bone and Skin and Muscle are not resampled in place of the background. Simple options
Advanced options
C) Pad ImageThis section simply pads the resample image of a few voxels to prepare it for the mesh generation using the Pad Image module. Simple options
Advanced workflow
|
3) Extract materials
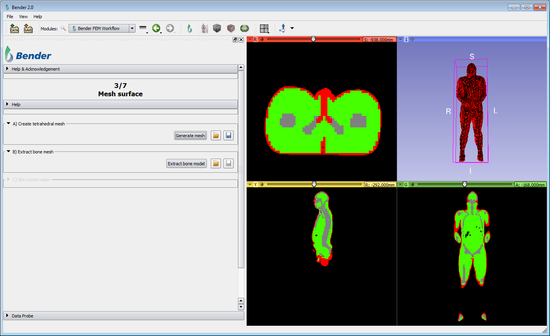
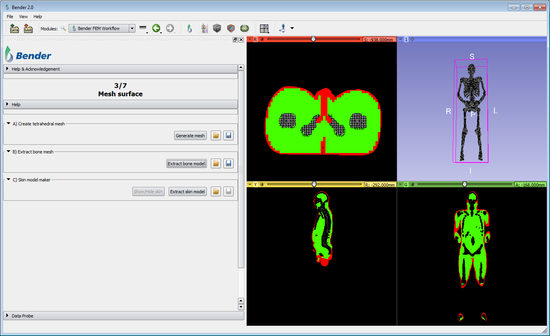
The 3) Extract materials page generates a multi-material tetrahedral mesh from the image and extracts bone and skin surface models to interactively control the posing.
A) Create tetrahedral meshIn a FEM workflow, repositioning happens on a tetrahedral mesh instead of a labelmap volume. This section generates tetrahedrals with associated material for each voxel. Simple options
Advanced options
B) Extract bone meshThis section extracts the bone material from the input tetrahedral mesh. Simple options
Advanced options
C) Extract skin meshThis section extracts the surface of the skin label in the input labelmap volume. The algorithm is different than Extract bone mesh because it solely needs the information of the background label. It creates an outer surface of the Foreground labels (all the labels that are not "Background"). Simple options
Advanced options
|
4) Create armature (rigging)
This section creates the rig of the volume to pose. Note: When opening this page, the view will automatically switch to 3D Only to help creating/visualizing the armature.
A) ArmaturesManually create or load an existing armature to fit on the bones of the volume to pose. The user is redirected to the Armatures module for manually editing (e.g. create/edit/remove a bone segment). The armature (either created or loaded) is the interface between the user and the transformations needed to pose the volume models. Note: Once completed, the armature rest positions should not be changed since it would require all the following computations to be updated as well. It is therefore highly encouraged to save the created armature in order to be able to restore it with Load armature from model. Simple workflow
|
5) Volume skinning
Before computing the weights, the skinning volume must first be extracted. The skinning volume represents what bone influence the most a given voxel. For each voxel a unique bone index is assigned. This means that if we were to use binary weights (see Compute Armature Weight), a given voxel would rotate similarly to its associated bone in the skinned volume. Because the skinning might not produces perfect results (some voxels might be assigned the wrong bones), and because the skinned volume drives the weight computation, it can be useful to tweak the output skinned volume, most notably in joints area. The Editor module can be used to edit the labelmap.
Note: When opening this page, the view switches to Four Up.
A) Volume skinningSimple workflow
Advanced workflow
B) Edit volume skinningSimple workflow
Advanced workflow
|
6) Compute weights
The Compute weights section assigns a weight for each voxel of the input volume. The weights represent how much a voxel is influenced by a bone. It is later used when posing the volume and computing the unique transform to apply at a voxel (by interpolating the influencing bones transforms).
A) Compute armature weightSmooth the Skinned volume by computing weights in order to consider the influence of every bone on a given voxel. Simple workflow
Advanced workflow
B) Evaluate weightsEvaluate weights at each vertices of the tetrahedral mesh. Simple workflow
Advanced workflow
C) Material propertiesApply material properties at each vertices of the tetrahedral mesh. Simple workflow
Advanced workflow
|
7) Pose armature (posing)
The Pose armature section guides the user into posing the armature for the final Pose labelmap resampling.
Note: When opening this page, the current armature automatically switches to Pose mode.
A) ArmaturesPose the armature by applying rotations to armature bones. You can directly pose the armature from the 3D view, if needed the Armatures module can provide more controls. Note: At this point only the Pose of the armature can be edited, if the "Rest" mode of the armature is changed, the skinned volume and bone weights must be recomputed. Simple workflow
Advanced workflow
B) Simulate PoseTransform the tetrahedral mesh according to the armature pose and the material properties. Simple workflow
Advanced workflow
|
Similar Modules
- Used modules
- Bender modules: Armatures, Change Label, Compute Armature Weight, Model Quadric Clustering Decimation, Pose Surface, Pose Labelmap, Sample Data, Skin Model Maker, Volume Skinning
- Slicer modules: Grayscale Model Maker, Models, Model Maker, Volumes, Volume Rendering
Developer Information
This module is a Python script module that can be manually edited for custom behavior (even in the installed version of Bender).
